Feedback capture grids are simple tools that help you collect, sort, and act on feedback from users and stakeholders, essential in UX (user experience) design. By organizing comments into clear categories like Likes, Criticisms, Questions, and Ideas, you can spot patterns quickly, prioritize improvements, and create better user experiences with confidence.
In this video, William Hudson, User Experience Strategist and Founder of Syntagm Ltd., explains how early-design methods like tree testing and first-click testing help you gather focused, quantitative feedback that complements tools such as Feedback Capture Grids.
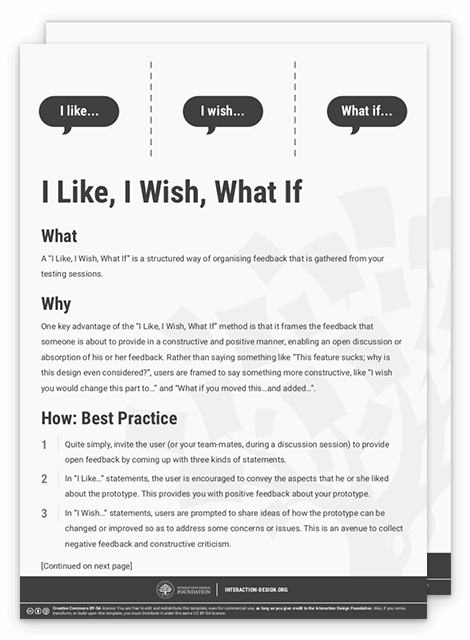
Why You Should Use a Feedback Capture Grid
Whenever you work on design solutions such as digital products and put them in front of others, feedback comes in fast. From proposed ideas about designs to early versions of apps and websites, you’ll get feedback from users, team members, and stakeholders and have the chance to harvest potentially rich and varied insights. However, without a clear system to do so, you may run into a problem; valuable insights often get lost in meeting notes, scattered stickies, or unread comment threads. Before you might start feeling disheartened, you’ve got a handy tool to rely on, as a feedback capture grid changes that.
The benefits of a feedback capture grid are that it gives you a structured way to collect and review feedback so you can:
Make Sense of Messy Input
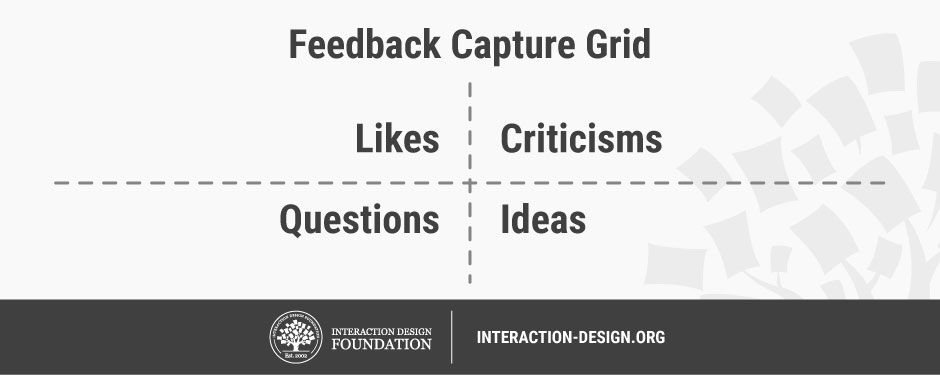
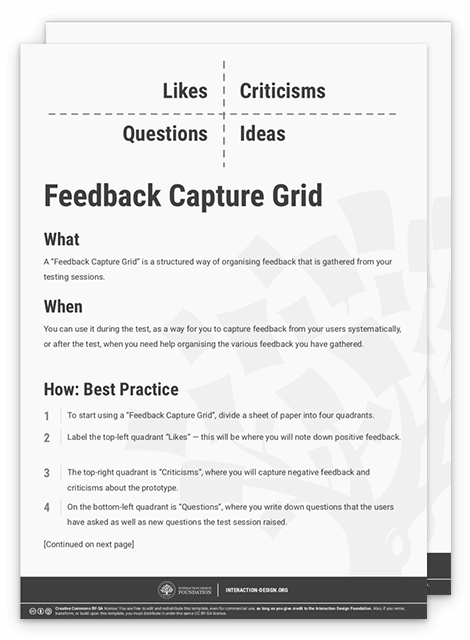
You organize raw feedback into four clear categories, commonly used in a feedback capture grid:
Likes are what users or stakeholders appreciated or thought worked well.
Criticisms are what they disliked, found frustrating, or thought didn’t work.
Questions are what they found confusing or were unsure about.
Ideas are any suggestions for improvement, feature requests, or new approaches.
When you put feedback “items” into these categories, you’ll find it will help you chart all that feedback sensibly, balance positive and negative input, and focus on what matters most.
Spot Patterns and Themes
In a typical feedback-capturing grid, you’ll notice repeated issues and common suggestions at a glance, and here are some examples that might come up:
In the “Likes” Quadrant
You may find consistent praise for a specific feature such as, “Everyone loved the drag-and-drop tool,” or repeated mention of smooth onboarding, such as, “Users found the sign-up flow easy and intuitive.” Visual design appreciation may appear, too, such as, “Multiple users commented on the clean layout or color scheme.”
In the “Criticisms” Quadrant
It’s where recurring usability issues go, such as, “Several users struggled to find the search bar.” Frustration with navigation is another example for this quadrant, such as, “Confusion around where to go next after completing a task.” The same goes for bugs or performance issues, such as, “The app froze on the same screen for multiple testers.”
In the “Questions” Quadrant
Queries regarding confusion about system behavior go in here, such as, “Why does the app log me out after 10 minutes?” Unclear language or terminology can feature, too, such as, “What does ‘workspace’ mean in this context?” Another area that tends to arise is uncertainty around data privacy or outcomes, such as, “What happens to my data after I submit this form?”
In the “Ideas” Quadrant
Creative aspects such as requests for customization go in this quadrant, like, “Could I rearrange the dashboard widgets?” Suggestions for new features can crop up, too, such as, “I’d love a dark mode option!” Look out for workflow improvement ideas, such as, “What if the system remembered my last filter settings?” too.
Cross-Quadrant Themes (Patterns that Span Categories)
Sometimes feedback comes in a little mixed. For instance, a praised feature can still cause confusion, such as, “Users love the visual dashboard but ask a lot of questions about what the graphs mean.” Or you might have multiple ideas pointing to the same underlying need, such as, “Requests for filters, tagging, and folders all point to a need for better content organization.” Or there might be a mismatch between expectations and experience: such as, “Users expected autosave, but the system makes them save manually, which causes a lot of frustration.”
Spotting these kinds of patterns helps you prioritize improvements based on frequency, severity, and impact. It ensures you’re going after and solving real user problems, too, not just reacting to individual comments.
.png)
© Interaction Design Foundation, CC BY-SA 4.0
Act on Real Insights
You can move quickly from “what they said” to “what we’ll do” and make the most of effective user research. Although this tends to take careful judgment and collaboration, the capture grid for feedback offers a powerful benefit. It’s like having a clear “runway” to take off from as you launch at each problem with a strong sense of direction. Plus, it can help safeguard you and your design team from assumptions taking your design down the wrong avenues.
In this video, William Hudson explains how user research gives you the actionable insights you need to move from assumptions to evidence-based design decisions.
Keep Teams Aligned
Feedback grids that capture excellent insights help everyone share the same view of what’s working and what needs fixing. When you set feedback out clearly, the grid becomes an excellent reference point and UX deliverable to show you know what you’re doing and what needs doing.
Build a User-Centered Culture
From a higher perspective, you’ll have proof where you can show that feedback leads to real change. That can become a powerful tool to present to stakeholders and (with clients’ and users’ consent) future employers.
The benefits extend in many directions, whether you’re running usability tests, gathering stakeholder input, or wrapping up a design sprint. The feedback capture grid helps you find important signals that might otherwise get lost in “feedback noise,” determine next steps, and take decisive action on design improvements or things to cut out. This layout works well in workshops, interviews, usability tests, and sprint reviews. It keeps feedback balanced and visible, and helps you make better decisions, faster. You can use it with sticky notes on a wall or digitally in tools.
In this video, Ann Blandford, Professor of Human-Computer Interaction at University College London, explains how semi-structured interviews reveal the reasons behind user behavior while highlighting why they cannot replace direct observation when you need reliable evidence for action.
When to Use a Feedback Capture Grid
The grid is flexible and lightweight, making it one of the most adaptable tools in your UX toolkit, and you can use a feedback capture grid at any stage of the UX design process where you need to capture input, review it, and act on it. Its common use cases include:
Usability testing, when you’re documenting user reactions, pain points, and suggestions in real time.
Stakeholder feedback, when you capture and clarify feedback after a design review.
In this video, Morgane Peng, Managing Director and Global Head of Product Design and AI Transformation at Societe Generale CIB, explains how common stakeholder comments reveal misunderstandings about design and why clear, structured feedback helps you refocus conversations on usability and real problems.
Retrospectives, when you reflect on what went well and what should improve next time.
Customer interviews, when you want to sort insights into actionable categories for follow-up.
Workshops and sprints, where you’ll want to organize group ideas quickly and democratically.
In this video, David Bill, Interaction Designer who led service design for five U.S. federal agencies at Booz Allen Hamilton before driving innovative design solutions as a Senior UX Designer at Amazon Web Services (AWS), explains how well-structured workshops help you gather diverse input quickly and turn group ideas into actionable direction.
How to Use a Feedback Capture Grid: A Step-by-Step Guide
Follow these steps to set up and use a feedback capture grid in your next session.
Step 1: Set a Clear Goal
Before you begin, ask yourself, “What am I trying to learn or improve?” and “Who is giving feedback, and why?” For example: “I want to test whether users can complete checkout in under two minutes.” A clear goal helps you filter what’s relevant.
Step 2: Choose Your Format
Depending on your setup, pick the format that works best. If it’s in-person, use a whiteboard and sticky notes. Remote calls for effective digital tools. In any case, you’ll want to create a simple 2x2 grid with each quadrant labeled: Likes, Criticisms, Questions, and Ideas.
Step 3: Capture Feedback Live
As users interact with your product in usability testing sessions for, for example, prototypes or when stakeholders review your work:
Write one point per sticky note or card.
Be specific. Use direct quotes whenever possible.
Place each note in the appropriate quadrant.
So, instead of writing, “User liked the homepage and checkout process, but had issues with the cart icon and didn’t understand the shipping timeline,” you’d break it into individual points such as: “Liked the homepage design,” “Found checkout flow smooth,” “Cart icon was hard to find,” and “Shipping timeline wasn’t clear.”
However, whenever you can, put direct quotes into the grid, such as: “Why do I have to fill this out again? It feels redundant.” Reviewing feedback written in the first person promotes empathy. And insert the feedback in the appropriate section as soon as possible. So, if a user says, “It would be great if I could log in using Google,” you’d immediately place that note in the Ideas quadrant, not under Criticisms.
Encourage the team to participate, too; it’s a team tool, so everyone should feel invited to contribute.
In this video, Alan Dix, Author of the bestselling book “Human-Computer Interaction” and Director of the Computational Foundry at Swansea University, explains how iterative prototyping helps you spot problems early so you can capture accurate feedback as users interact with your design.
Step 4: Group Similar Comments
After the session, look at the feedback in each quadrant. Group similar items together and watch out for these sorts of issues: “Are users struggling with the same feature?” or “Are multiple people asking the same question?”
Clustering feedback helps you see patterns and surface high-impact issues.
Step 5: Prioritize and Plan
Once you’ve grouped feedback, it’s time to:
Identify what’s urgent or easy to fix.
Tag feedback by impact or feasibility.
Create action items and assign them to the right people.
For example, you might notice three users struggled to find the “Next” button on a mobile screen. That’s both frequent and easy to resolve with layout tweaks, so flag it for immediate action.
When you turn sticky notes into backlog items, Jira tickets, or design tasks, you’ve moved from collection to action.
Step 6: Summarize and Share
Before you move on, write a brief summary of:
What were the top three insights? For example: “Users liked the visual design of the dashboard. The profile setup process confused 4 out of 6 users. Everyone suggested adding export options for reports.”
What decisions are you making based on them? For example, “We’ll simplify the profile setup flow by reducing required fields. We’ll add tooltips to explain dashboard metrics. We’ll make export functionality a priority in the next sprint.”
What are the next steps? For example, “Design revised profile flow (due Thursday). Write tooltip copy (due Friday). Add export feature to sprint planning doc for next week.”
Summaries make for handy sharing, so share this with your team and stakeholders so that everyone sees how feedback is driving progress towards a clear and common goal.
Step 7: Revisit and Repeat
Use the feedback capture grid as part of an ongoing process. After implementing changes:
Re-test with users.
Run another grid session.
Compare new feedback to earlier themes.
For example, for Likes you might have: “Much easier now to apply promo codes.” For Criticisms, you might have: “Order summary still not visible until too late.”
Revisiting and repeating is vital as it keeps your design evolving and responsive to real user needs.
Best Practices and Tips for Feedback Capture Grids
Here are a few simple practices to help make your feedback capture grid even more effective:
Be consistent: Use the same categories and format across projects.
Keep it simple: Four quadrants are usually enough; too many categories can slow things down.
Encourage specifics: Push for context and reasons; for example, “I didn’t like it!” isn’t as useful as “The menu was hard to find on mobile.”
Timebox your sessions: Limit collection and analysis time so your team stays focused; it’s a constraint that can help greatly.
Add context: Label your grid with the session date, version tested, and type of participants for easy reference later.
Act on what you collect: If feedback goes into the void, people stop sharing it. Always link feedback to visible decisions or actions; it’s a “living” document.
Using feedback capture grids regularly helps you build a stronger feedback culture. You show users and team members that their input is heard, respected, and acted upon, and that you’re a designer who’s pragmatic and focused.
Overall, a feedback capture grid or feedback capture table is a simple but powerful way for you to organize user and stakeholder feedback. It enables you to clearly view what works and what needs work, and gives you a treasure trove of actionable insights. The power of authentic feedback capture makes this a unique tool to help you align teams, communicate decisions, and design experiences grounded in real user needs.
You might be working on a new feature, reviewing a prototype, or planning a sprint; this tool helps you turn what people say into what your team knows is worth building, fixing, and refining. Try using a feedback capture grid in your next session and you may find, if you set a goal, listen closely, sort with care, and take action, you’ll take a fast-track on more solid ground towards designing with users, not just for them.