Your constantly-updated definition of High-Fidelity Prototypes and collection of videos and articles. Be a conversation starter: Share this page and inspire others!
295 Shares
What are High-Fidelity Prototypes?
High-fidelity prototypes are highly detailed, interactive representationsof a product thatclosely resemble their final design. They are often created with design software and provide a realistic preview of the user experience and visual aesthetics of a product. High-fidelity prototypes are used for user testing, stakeholder approval and developer handoffs.
Explore how high-fidelity prototypes help designers in the design process, in this video with Games UX Consultant, Om Tandon.
Transcript
Transcript loading ...
Why Are High-Fidelity Prototypes Important?
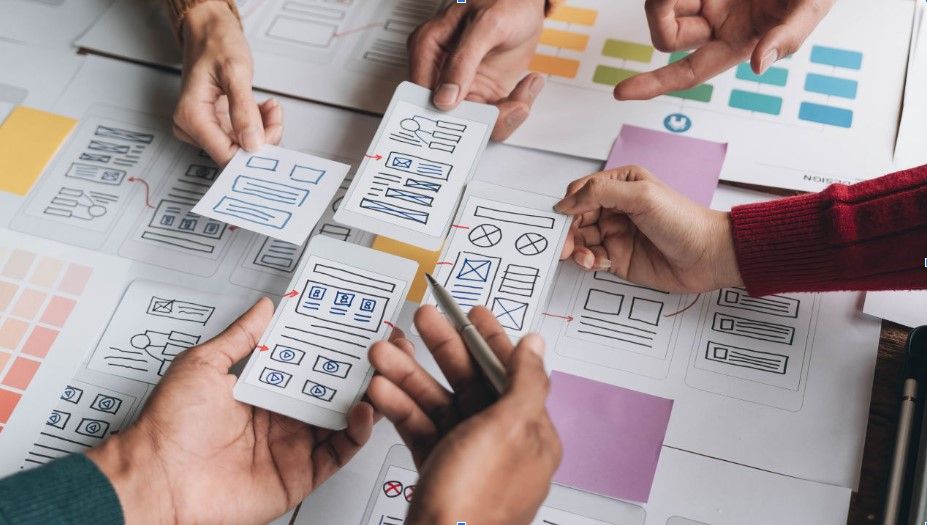
High-fidelity prototypes bridge the gap between the design concept and the final product. Designers use this type of prototype to simulate and test a realistic user experience of the product, identify potential issues and gather feedback. This allows for a better refinement of the product before development commences. In other words, hi-fi prototypes help identify and tackle issues early, which saves costs by reducing expensive design overhauls late in the development cycle. Also, they facilitate smoother handoffs between design and development teams, which minimize misunderstandings and delays that can increase project costs.
What’s more, high-fidelity prototypes facilitate collaboration between the design team and stakeholders. They help visualize the project, keep all parties aligned and are especially useful when liaising with people with no design background. Ultimately, high-fidelity prototypes help secure stakeholder buy-in.
High-Fidelity Prototypes vs. Low-Fidelity Prototypes: What’s the Difference
Fidelity refers to the level of detail and functionality of a prototype. Usually, this will depend on the product’s development stage. A prototype can give a wide view of the entire system or subsystem (called a horizontal prototype—e.g., an entire website) or it can give a detailed view of just one feature (a vertical prototype—e.g., a checkout process).
Here are the main differences:
Low-fidelity
Example: Paper prototypes.
Pros: Fast and cheap; disposable; easy to make changes and test new iterations; allow a quick overall view of the product; anyone can produce them; encourage design thinking since prototypes are visibly not finalized.
Cons: Lack of realism, so users might have a hard time giving feedback; hard to apply results from crude early versions; may be too basic to reflect the user experience of the finished product; can oversimplify complex issues; lack of interactivity deprives users of direct control.
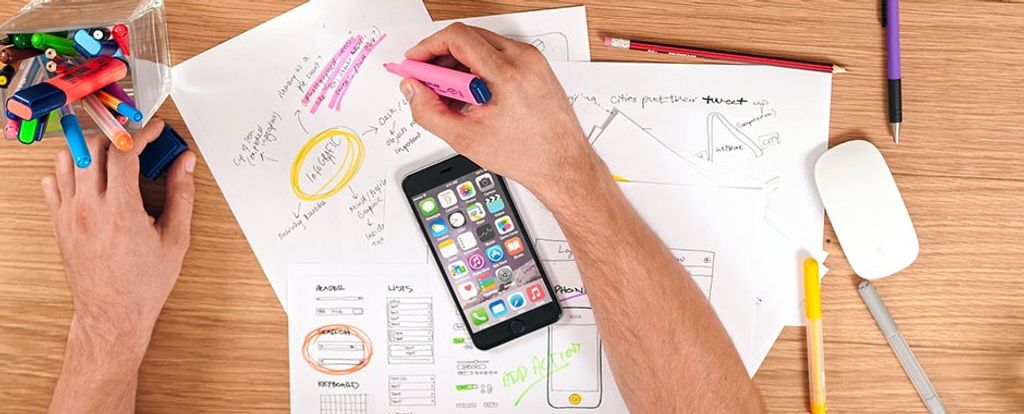
Paper prototyping is a rapid design method involving hand-drawn sketches or printed representations of a user interface. This low-fidelity approach allows designers to quickly visualize and test design concepts without the constraints of digital tools.
Example: Digital prototypes created on software such as Figma.
Pros: Engaging—all stakeholders have the vision realized in their hands and can judge how well it matches users’ needs and solves their problems; testing will yield more accurate, more applicable results; versions closest to the final product enable you to predict how users will take to it in the marketplace.
Cons: Longer/costlier to create; users are more likely to comment on superficial details than on content; after hours of work, you the designer are likely to dislike the idea of making changes, which can take considerable time; users may mistake the prototype for the finished product and form biases.
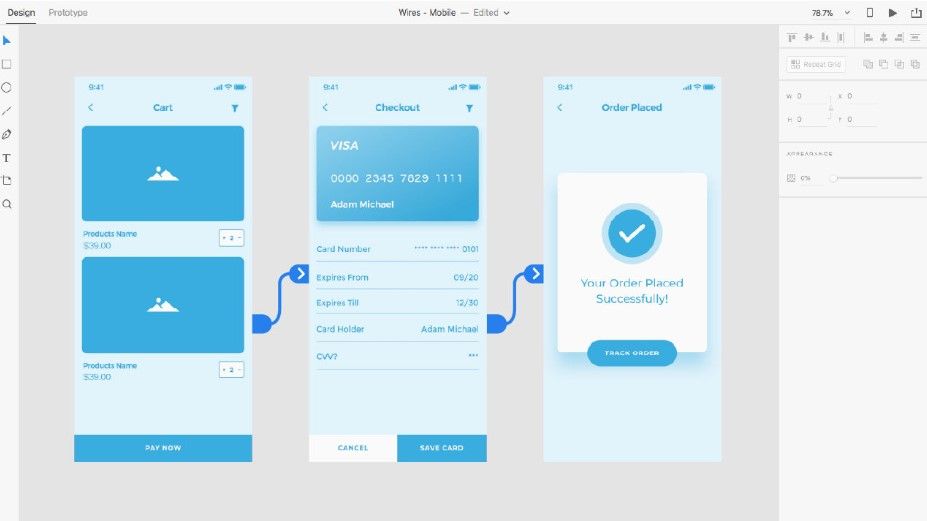
Interactive prototypes are advanced high-fidelity mockups that enable users to interact with the design, simulating real-world usage. They offer a more immersive experience compared to static prototypes.
Some designers split high-fidelity prototyping into “mid-fidelity” (where prototypes can have basic digital interactivity or be slick wireframes) and “high-fidelity” (where they’re far closer to the final version). Interactive prototypes yield far more useful results in user tests. However, fidelity is relative—a static mockup of a landing page, for example, is of higher fidelity than sketched cut-outs users can move. Overall, the right prototype depends on the project stage and the specific product.
Questions About High-Fidelity Prototypes? We've Got Answers!
What is a high-fidelity prototype in UX design?
A high-fidelity prototype is arealistic and interactive representation of a digital product that closely mirrors the final design in detail and functionality. It includes accurate layouts, typography, spacing, visuals, and interactivity such as clickable buttons, page transitions, and even micro-interactions. “Hi-fi” prototypes give stakeholders and users a near-final look and feel of the user interface without writing production-ready code.
Designers use high-fidelity prototypes to simulate the full user experience, making it easier to identify usability issues and gather reliable feedback. They are especially effective in stakeholder presentations and user testing because they eliminate ambiguity and showcase how users will interact with the final product.
Designers focus on consistency, visual hierarchy, and real content instead of placeholders so their hi-fi prototypes become a vital bridge between design and development, minimizing guesswork and miscommunication.
How is a high-fidelity prototype different from a low-fidelity one?
High-fidelity and low-fidelity prototypes differ in detail, realism, and purpose. A high-fidelity prototype closely mimics the final product and includes polished visuals, real content, exact spacing, and interactive features.
Meanwhile, a low-fidelity prototype is a rough, simplified version, often sketched or wireframed or cut out from paper or card. It focuses more on layout and functionality ideas than on aesthetics or interactivity.
Designers use low-fidelity prototypes early in the UX design process to explore concepts quickly and cheaply—they are great for brainstorming, rapid iterations, and getting initial feedback. High-fidelity prototypes, in contrast, come later in the process to validate usability, gather more accurate user feedback, and prepare for handoff to development.
Another major difference lies in user perception—users might find a “lo-fi” prototype too sketchy or abstract if it is not made well. Meanwhile, they might not criticize a “hi-fi” prototype because of its finished appearance. Prototyping is essential in any case, and choosing between the two depends on your project phase and goals.
Create a high-fidelity prototype once your basic layout, user flow, and content structure are in place and validated through low and mid-fidelity prototypes. Early design testing is vital to this stage, following ideation and user feedback cycles. It is wise to use high-fidelity prototypes to test usability in detail, simulate real interactions, or get stakeholder approval.
High-fidelity—sometimes called “high-fi” or “hi-fi”—prototyping is like a “safety net” to help designers catch design issues and align the team on what the final product should look and feel like. Avoid jumping to high-fidelity too soon; the early testing you do can save you and your team from wasting time on refining features that have not been validated or (worse) design ideas that are dead wrong. In short, the time to use hi-fi prototypes is when you are confident in the design direction and ready to fine-tune the user experience and visual details.
Do I need to know how to code to create a high-fidelity prototype?
No, you do not need coding skills to create a high-fidelity prototype. Modern tools allow designers to build highly interactive, realistic prototypes using visual interfaces. These platforms simulate interactions like clicks, scrolls, and transitionswithout requiring developers to write code.
Even so, an understanding of how code works can improve communication with developers and help you design more feasible interactions. Designers with a grasp of development constraints can avoid suggesting designs that are difficult or expensive to implement and instead create prototypes that are realistic enough for users and stakeholders yet flexible enough for changes without code-level complexity.
A high-fidelity prototype should be detailed enough to mimic the final user experience without duplicating production-level code. You want it to reflect exact UI elements, spacing, typography, color schemes, and real (or close-to-real) content such as information architecture. Interactive elements such as navigation, buttons, and micro-interactions should function similarly to the final product.
That level of detail empowers teams to validate usability, get meaningful feedback, and align on expectations before development begins. Still, avoid overbuilding or over-detailing every screen; only prototype the screens and flows you need to test specific user journeys or showcase core features. Include enough fidelity so users, stakeholders, and developers understand the design intent.
Investigate information architecture (IA) closely for helpful points about how to make better prototypes and design solutions.
Should I include animations in a high-fidelity prototype?
Include animations if they enhance understanding, improve usability, or showcase important transitions. Animations can communicate relationships between elements, give feedback, or guide user focus, functions that static screens cannot deliver as effectively.
Use micro-interactions like button feedback, form validations, or progress indicators to create a smoother experience. Animations can also help demonstrate the tone of the product and brand personality, which can influence how users perceive your interface.
However, use animations selectively, as overuse can distract users or complicate testing. Focus on interactions that add value, such as expanding menus, page transitions, or loading effects that simulate a live product. And always test animated interactions with users to ensure they support usability goals.
How many screens should a high-fidelity prototype include?
A high-fidelity prototype should include only the screens necessary to represent key user flows and core functionalities. Rather than design every possible screen, focus on the most important paths,typically between 5 and 15 screens,depending on the product complexity and your goals.
For usability testing, include all steps in the most common user tasks, such as sign-up, checkout, and profile edit. For stakeholder presentations, include screens that show value, visual appeal, and functionality.
Do not try to prototype every page unless the project demands exhaustive documentation. Keep the prototype navigable, consistent, and task oriented. The goal is not quantity—it is clarity and usability.
Should I test my high-fidelity prototype with users?
Yes, testing your high-fidelity prototype with users is a “must,” as it reveals how people interact with your design, what they find confusing, and what they enjoy. Since high-fidelity prototypes closely resemble the final product, users respond more realistically in their behavior than they would to wireframes or sketches.
Usability testing at this stage helps you validate layout choices, content clarity, and interaction patterns before development begins, which means fewer costly revisions later. Test with a mix of real users and stakeholders to uncover both practical and strategic insights. Use specific tasks during testing, such as completing a checkout process or editing a profile. Record behaviors and ask follow-up questions to understand intent. Last, but not least, note that users may not be as critical of hi-fi prototypes (for fear of offending you), so keep a close watch on their behavior first and foremost with your prototype.
Explore how usability testing empowers designers to weed out problems and refine better designs.
What should I include in my prototype for an effective handoff?
For an effective design-to-development handoff, the hi-fi prototype should include all key screens, interactive flows, and clear design specifications. Use consistent styles for buttons, typography, colors, and spacing. Include hover states, active states, and error messages to show how the interface should behave in different scenarios.
Add annotations or notes where interactions, transitions, or logic are not obvious. Developers must understand not just what the user sees but how it should work behind the scenes too. Ensure you include real or finalized content instead of placeholder text.
Organize the prototype logically, and make sure it reflects the final visual direction. Label screens clearly and maintain design consistency throughout. It is important to collaborate early and often so developers get a good idea—the clearer your prototype, the smoother the implementation.
How do I gather feedback on a high-fidelity prototype?
Collect feedback by conducting usability tests, running stakeholder reviews, and sharing interactive prototypes with clear instructions. Begin by observing real users completing tasks using the prototype; where do they pause, hesitate, or make errors? Ask open-ended questions to uncover their reasoning and note that users might not be as critical of high-end prototypes because they will not want to offend the designer.
Involve developers and product managers to validate feasibility and identify missing details.Share prototypes with collaborators using comments and feedback tools. Encourage asynchronous reviews, but guide reviewers by asking specific questions, such as: “Is the navigation intuitive?” or “Are the interactions clear?”
Synthesize feedback to find patterns instead of reacting to individual opinions. Look for usability issues, confusion points, and unmet user needs—you want a prototype that proves empathy with users in their context. Then, iterate quickly, being sure to prioritize changes based on impact and effort. Lastly, keep a record of feedback and how it influenced revisions.
What are common design mistakes with high-fidelity prototyping?
Designers often make mistakes like overcomplicating the prototype, ignoring usability, or skipping real content. A major pitfall is focusing too much on visuals without validating user flows or interactions; a beautiful prototype counts for little if users cannot easily complete tasks.
Another common error is creating too many screens or detailing unnecessary interactions, which can waste time and delay feedback cycles. Using placeholder text can confuse testers and skew results, so always aim for clarity with real or realistic content.
Failing to test early and often is another key mistake—high-fidelity prototypes should evolve based on feedback, not remain static. If testing has not happened before the hi-fi prototype comes about, it can be hazardous to the design.
Inconsistent spacing, unclear navigation, and poor accessibility also affect prototype and design quality. Design with users in mind, not just stakeholders. Last, but not least, collaborate with developers early to avoid surprises after handoff.
Find out how to hit the ground running with rapid prototyping and get into the habit of prototyping early in your design process.
What are some helpful resources about high-fidelity prototypes for UX designers?
Nielsen Norman Group. (n.d.). UX Prototyping: 5 Factors for Selecting the Right Tool [Video]. Nielsen Norman Group. Retrieved from https://www.nngroup.com/videos/prototyping-tool/ This video breaks down five critical criteria UX designers should use when choosing a prototyping tool. It emphasizes aspects like realistic interaction support, usability, collaboration features, fidelity control, and integration with workflows. For those crafting high‑fidelity prototypes, it offers a guide to pick tools that support polished visuals and user testing without excess complexity. As a trusted, research‑based source, it aids designers in avoiding tools that hamper iteration or misrepresent interactions. This clarity ensures prototypes serve testing and communication effectively without unnecessary friction.
Babich, N. (2020, March 10). From Ideas to Prototypes—Tips to Improve Your Design Process. Smashing Magazine. Retrieved from https://www.smashingmagazine.com/2020/03/ideas-prototypes-tips-design-process/ Nick Babich outlines a refined workflow guiding designers from abstract ideas through to functional prototypes. He emphasizes validating assumptions, defining MVP boundaries, and prioritizing usability before jumping into high-fidelity execution. The article helps UX professionals streamline their design iterations, avoid unnecessary detail too early, and craft prototypes that remain flexible for feedback. Designers gain practical steps to balance speed and fidelity—ensuring their high-fidelity prototypes serve clear testing goals and stakeholder communication without over-investing in visuals prematurely.
Jeliazkov, D. (2021, November 22). Why Fidelity Matters. UX Planet. Retrieved from https://uxplanet.org/why-fidelity-matters-749ac49df7d1 This article by Denislav Jeliazkov explores the strategic role of fidelity in prototyping. It examines when low-, mid-, and high-fidelity approaches make sense, and details how high-fidelity prototypes enhance the realism of usability testing and strengthen stakeholder engagement. UX designers learn the value of choosing the appropriate fidelity based on project stage and goal. The post makes designers more deliberate—helping them avoid common traps like overfidelity before validation. It supports creating prototypes that communicate intent clearly, reduce ambiguity, and yield actionable feedback aligned with real user expectations.
Earn a Gift! Answer a Short Quiz at the End of This Page
Earn a Gift, Answer a Short Quiz!
1
2
3
4
1
2
3
4
Question 1
Question 2
Question 3
Get Your Gift
2
3
4
2
3
4
Question 1
Question 2
Question 3
Get Your Gift
3
4
3
4
Question 1
Question 2
Question 3
Get Your Gift
4
4
Question 1
Question 2
Question 3
Get Your Gift
Try Again! IxDF Cheers for You!
0 out of 3 questions answered correctly
Remember, the more you learn about design, the more you make yourself valuable.
Why? Because design skills make you valuable. In any job. Any industry.
In This Course, You'll
Get excited when you discover the secret to a portfolio that fast-tracks your way to job offers. Did you know most hiring managers decide on your application in just 7.4 seconds? In today's competitive job market, first impressions are everything.
Learn to build a career where you fulfill your potential and earn a salary that reflects your true value. Your design portfolio is your ultimate advocate. It speaks for you when you're not in the room. In this course, you'll get real-world insider insights from an expert who's reviewed thousands of portfolios. Take the course and build the career you're truly meant for.
Make yourself invaluable when you learn how to hook hiring managers with your problem-solving mindset, user-centered design approach, and business acumen. We know how frustrating it is to apply for job after job with no response. As AI makes it easier to generate generic portfolios and case studies, you stay in demand by clearly showing your timeless human-centered design skills: How you think, make decisions, and solve real problems. This User Experience/User Interface (UX/UI) portfolio course gives you the skills to finally stand out from the pack. Whether you're new to design or already experienced, you'll turn your past work experiences into portfolio gold and create a portfolio they love! No matter your background, it's easier than you think.
Gain confidence and credibility with our step-by-step blueprint for a portfolio that gets you hired faster into a role where you'll fulfill your purpose and increase your salary potential. Through hands-on projects and ready-to-use downloadable templates, you'll develop a winning portfolio strategy, write attention-grabbing hooks, present your portfolio with confidence, and master the first impression formula. You'll walk away with a pitch-ready UX/UI design portfolio you can use to land your dream job.
It's Easy to Fast-Track Your Career with the World's Best Experts
Master complex skills effortlessly with proven best practices and toolkits directly from the world's top design experts. Meet your expert for this course:
Morgane Peng: Designer, speaker, mentor, and writer who serves as Director and Head of Design at Societe Generale CIB.
Get an Industry-Recognized IxDF Course Certificate
Increase your credibility, salary potential and job opportunities by showing credible evidence of your skills.
IxDF Course Certificates set the industry gold standard. Add them to your LinkedIn profile, resumé, and job applications.
Be in distinguished company, alongside industry leaders who train their teams with the IxDF and trust IxDF Course Certificates.
All Free IxDF Articles on High-Fidelity Prototypes
6 Common Pitfalls in Prototyping and How to Avoid Them
Prototyping is an indispensable part of the design thinking process. However, it’s crucial to know how to prototype the right way and avoid some common pitfalls. If not, your prototyping efforts might be for nothing as your biases and inefficiencies will lead to a suboptimal design solution. Let’s l
14 UX Deliverables: What will I be making as a UX designer?
What does a UX designer actually produce? Here, we will explore the concept of UX deliverables, a term that describes the outputs of a UX design process during its various stages. The deliverables produced by UX designers vary according to their role in the design team and also depending on the meth
What UX Tools Do I Need to Create My Portfolio, and How Do I Learn Them?
“What UX tools should I learn so that I can build my portfolio?” “How do I learn UX tools?” We get these questions a lot here at the Interaction Design Foundation. If you’re starting out in UX, you might have these burning questions, too. So, here, we’ll go through everything you need to know about
Social shares
669
Published
Read Article
6 Common Pitfalls in Prototyping and How to Avoid Them
Prototyping is an indispensable part of the design thinking process. However, it’s crucial to know how to prototype the right way and avoid some common pitfalls. If not, your prototyping efforts might be for nothing as your biases and inefficiencies will lead to a suboptimal design solution. Let’s look at six common pitfalls and misconceptions of prototyping that can undermine your prototyping process, as well as how to combat each of them and build better products.
Prototyping is incredibly important. When you create prototypes to test them with users or to discuss your design ideas, you can gain important feedback that lets you improve your ideas. However, there are also many misconceptions about how to prototype that might cause you to go down the wrong path. That’s why we’ve listed below six common misconceptions and pitfalls, as well as solutions to each to help you reframe your mindset. Let’s get started!
1st Pitfall: Diving Into the First Good Idea
It’s tempting to grab at the first glimmer of light you see and run with that as your final solution. Perhaps you’ve come up with a great idea and can’t see why it might fail.
However, diving into the first good idea is not a good idea, because most problems we want to solve are more complex than they look on the surface. If you latch onto a promising idea and push it all the way into a fully formed solution, you might find out too late that you’ve gotten a couple of assumptions wrong (if you are lucky). The way people behave, constraints in the environment and a thousand other factors might cause matters to turn out differently from your or your team’s expectations.
Prototyping, especially the higher-fidelity version, can be expensive and time-consuming. If you commit to prototyping the first option, you may spend all your time trying to make a suboptimal idea work rather than finding a better or simpler idea.
Solution: Explore a Range of Different Approaches First
Start with a diverse range of ideas. Go through a divergent ideation process, where you come up with as many ideas as possible, even when you think you’ve got a “best” idea. Use low-fidelity prototypes to help you—for instance, sketch out your ideas as you brainstorm, and share them with your team-mates to create even more ideas.
One of the keys to successful prototyping is to work through a number of models and explore different approaches. That way, you can include the best characteristics and remove problematic ones for the final solution.
Test out many ideas. Test them by building prototypes—no matter how rough and simple—and test them on team-mates, internal stakeholders and users. Test many alternatives even within one idea. Most times, you will be inspired to create more ideas or merge a few solutions into a better and more successful one.
2nd Pitfall: Falling in Love with Your Prototypes
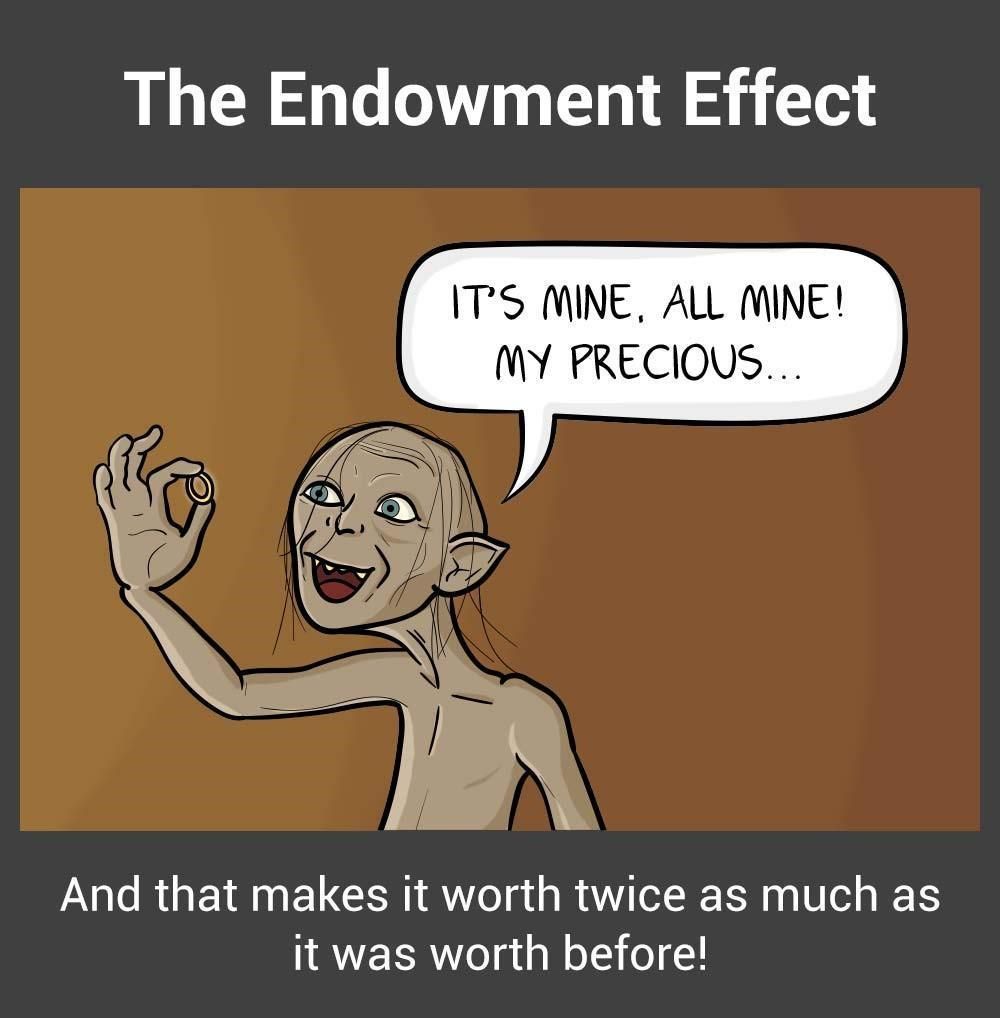
The endowment effect,otherwise referred to as “investment bias”, can interfere significantly with your prototyping process. The endowment effect happens when people ascribe more value to an object simply because they have ownership over it.
In prototypes, the endowment effect can create the dangerous situation wherein prototypes become too precious to fail or give up on.
The endowment effect can make you fall in love with your prototypes and hinder objective evaluation of their effectiveness in solving user needs.
The danger of falling in love with your prototypes is that you can get overly invested in the success of your prototypes, and thus overlook faults and negative user feedback. If you insist on implementing a prototype because of the amount of time and effort you’ve put into it, you can end up with something you love that doesn’t help solve your users’ needs.
Solution: Start with Cheap and Fast Prototypes
Start simple. Make quick and fast prototypes. Make use of low-cost, readily available materials in early-stage, low-fidelity prototypes. Always make sure that your prototype has just the level of detail required for what you are testing for, never too much. For example, use sketches and paper prototypes in the early parts of your design process. This prevents you or your team-mates from becoming too attached to a prototype. If you spend too much time early in the design process to create high-fidelity prototypes that look great, you might dupe yourself into thinking that you’ve landed on a miraculous discovery, a winner that will definitely resonate with users.
Also, be prepared to break, completely destroy or throw those models away once the questions they pose are answered. You can achieve this mentality by using low-cost materials in your prototypes. Test out a number of ideas and models as rapidly as possible in order to avoid becoming anchored to one stream of thought.
3rd Pitfall: Wasting Time Explaining and Pitching
Design thinking has a bias towards action. This means it’s always better to show rather than tell—avoid spending too much time pitching and explaining ideas rather than making things. This results in a theoretical focus and could lead you to move forward with ideas that you have not tested. As much as possible, create prototypes to explain your ideas. If you are unable to show how your idea works, you may find there are holes in the idea—and that’s a learning opportunity right there!
Solution: Have a Bias Towards Action
Embrace a bias towards action by opting to show the value of the ideas instead of telling everyone how great they are. When you build simple prototypes to show what your ideas are, you also make them much easier to understand and allow others to build on them.
For instance, when IDEO was approached by Gyrus ACMI, a medical visualization and energy systems company, the team met with specialist surgeons to understand their needs better. After one of the surgeons explained (or tried to explain) how their surgical instrument could be improved, an IDEO designer immediately created a rough prototype of the idea. The team was able to understand instantly what the surgeon meant, and they brought the discussion forward and saved the team many more meetings. Prototype to show, because showing is much more productive than telling.
4th Pitfall: Prototyping Without a Purpose
Why are you prototyping? Always make sure you can answer this question before you begin to prototype. You should create a prototype to answer specific questions, test and validate assumptions, illustrate an idea, flesh out an idea and so on. If you prototype for the sake of prototyping, you’ll lack a focus. You’ll likely create a prototype with too much detail, which is a waste of resources, or too little detail, which makes it ineffective in tests.
Solution: Have a Question in Mind
Before you create a prototype, ask yourself, “Why am I creating this prototype?” Make sure you have a central purpose (i.e., to test your assumption X, or to test the usability of your solution, etc.), and then build your prototype to match that purpose. For instance, if you need to test your assumption that users will not be willing to use a piece of equipment heavier than 2 kilograms, then you don’t even need to create a functional prototype. Simply create a prototype that weighs under 2 kg, and another that weighs over 2 kg, and test both on users. You’ll save time and still be able to learn exactly what you want to learn.
5th Pitfall: The Failure Roadblock: Feeling Discouraged by Failed Prototypes
“Failure” and prototyping go hand in hand. After all, you are likely to discover mistakes when you test your prototypes. The danger here is that you might feel disillusioned and unmotivated to move forward in your design process.
“I have not failed. I’ve just found 10,000 ways that won’t work.”
– Thomas Edison, American inventor.
Reframe the idea of failure in prototyping into a learning mentality. Remind yourself that wrong ideas and failed prototypes allow you to learn more than successful tests and prototypes do. Embrace the principles of lean methodology by working validation into every decision that you make or have a hand in making. Validation reframes the concept of failure and makes it part of the process of learning instead of being a destructive influence. When you think of prototypes as learning opportunities, you set yourself up for a kind of positive failure that leads to a new, more informed experiment.
6th Pitfall: Seeing Prototypes as a Waste of Time
If you constantly need to build prototypes for every idea and assumption that you have, wouldn’t you be wasting time? Many times, designers and teams who are not used to design thinking feel that prototyping is a waste of time and resources. “Wouldn’t building prototypes slow us down?” they ask. “Wouldn’t we be better off to stay focused on the drawing board before we get around to putting things together in the real world?”
The truth is the opposite. Although we might spend time when we build prototypes, they actually allow us to move faster in the long term. It’s because, through prototyping, we are able to see whether our ideas would work out, and refine or abandon them. In the long term, we will be able to reach the ideal solution faster.
Solution: Adopt a Long-Term View
Build prototypes with a long-term view in mind. When you make prototypes, remember that the small amount of time you spend now will help you save days and even weeks of hard work—or needless toil, more like—in the future. Communicate to internal stakeholders who are concerned about the time “wasted” on prototypes, so the whole team (and ideally, the whole company) is on the same page. It may seem counter-intuitive, but spending time on prototypes will save you time.
Download Our Template of the 6 Common Pitfalls in Prototyping
We’ve created a template that contains all six of the common pitfalls we described above, as well as ways you can solve them:
Advance Your Career With This Free Template
for “6 Common Pitfalls in Prototyping and How to Avoid Them”
The Take Away
Prototyping is crucial in every design thinking project. However, there are pitfalls that could undermine your efforts to let prototypes work for your team. Specifically, you should avoid six of these common pitfalls. Learn to embrace the idea of constantly and rapidly prototyping, and make sure you have the right mindset when making prototypes. The old saying goes that nothing is more powerful than an idea whose time has come. That may seem all very well, but a series of prototypes will bring such an idea into the real world where people can make it truly powerful.
References & Where to Learn More
Tim Brown, Change by Design: How Design Thinking Transforms Organizations and Inspires Innovation, 2009
AI is replacing jobs everywhere, yet design jobs are booming with a projected 45% job growth.
With design skills, you can create products and services people love. More love means more impact and greater salary potential.
At IxDF, we help you from your first course to your next job, all in one place.